
 My 1973 Jaguar XJ12L series II

This is where it gets really bad... the head wouldn't come off. I joined the Jaguar Enthusiast Club & mercilessly phoned every expert they listed. The prognosis was not good. It was possible to separate the block & head by force but as the head is aluminium & comparitively long, it is very sensitive to bending forces & will easily warp if badly handled.
I couldn't afford a new head so I devised a tool to pull the head off. In order to get the dimensions correct I needed a blueprint of the head or block. To get this I phoned the Jaguar factory & was put thru to Technical Publications.
I taked to the chap & he gave me the number of power units engineering. There, I spoke to the chief engineer who was very sympathetic & he transferred my call the then joint head of Power Units & Service who listened carefully, agreed to send me the blueprint for the head gasket & then asked me what department I was from. I had to admit I was only an enthusiast. It didn't seem to bother him a bit & I received the blueprint a few days later.
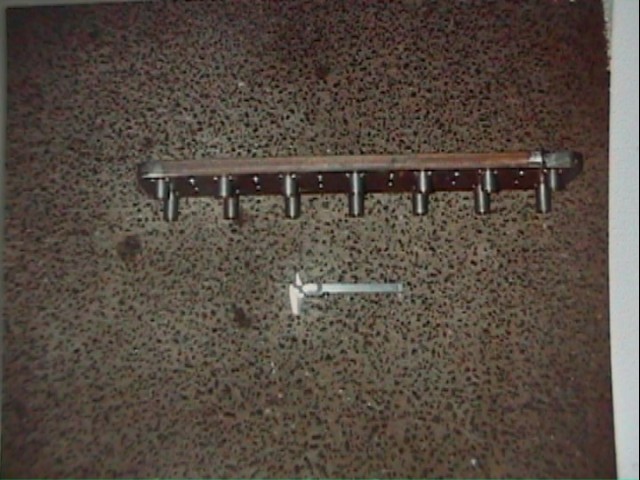
This is my design for the head puller. Its made out of 1 inch thick steel plate to prevent bending of the head & it has 14mm heavy threaded tubes welded above each head fixing stud. It looks bent in this picture but its actually straight as a die. This is a photo I have taken a picture of with a digital camera & unfortunately the original photo is curved.
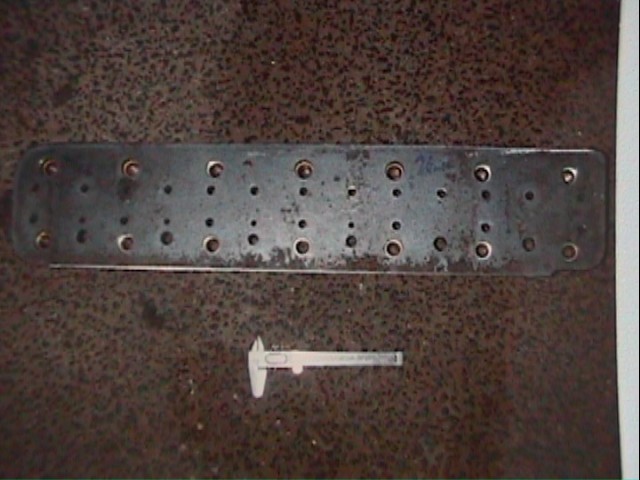
As you can see its a fair old length.
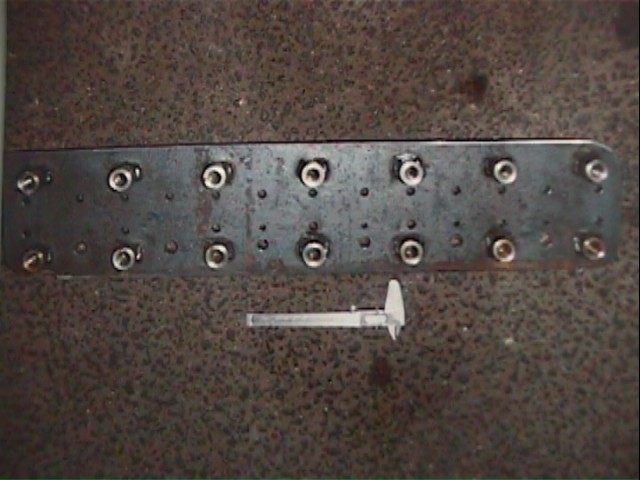
A better view of the threaded tubes. The tubes themselves are 1 inch o/d.
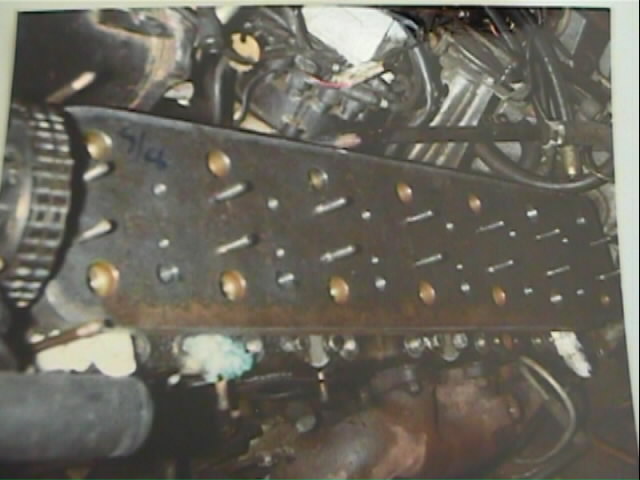
And here it is in position. The tubes locate over the head studs & the tool itself attaches to the cam carrier on the head. 14mm bolts are screwed into the tubes & they press down on the studs, pushing the head off the block.